Milton’s Cauliflower Pizza Baking Instructions: A Comprehensive Guide
Welcome to the ultimate guide for enjoying Milton’s Cauliflower Pizza! This resource details achieving a perfectly baked, crispy, and flavorful pizza experience.
Discover optimal baking times, alternative methods, and troubleshooting tips for consistently delicious results.
Understanding Milton’s Cauliflower Pizza
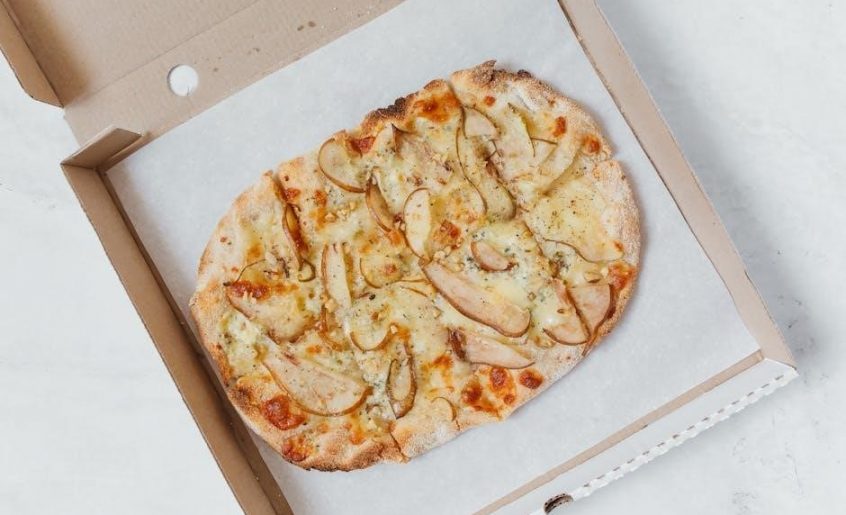
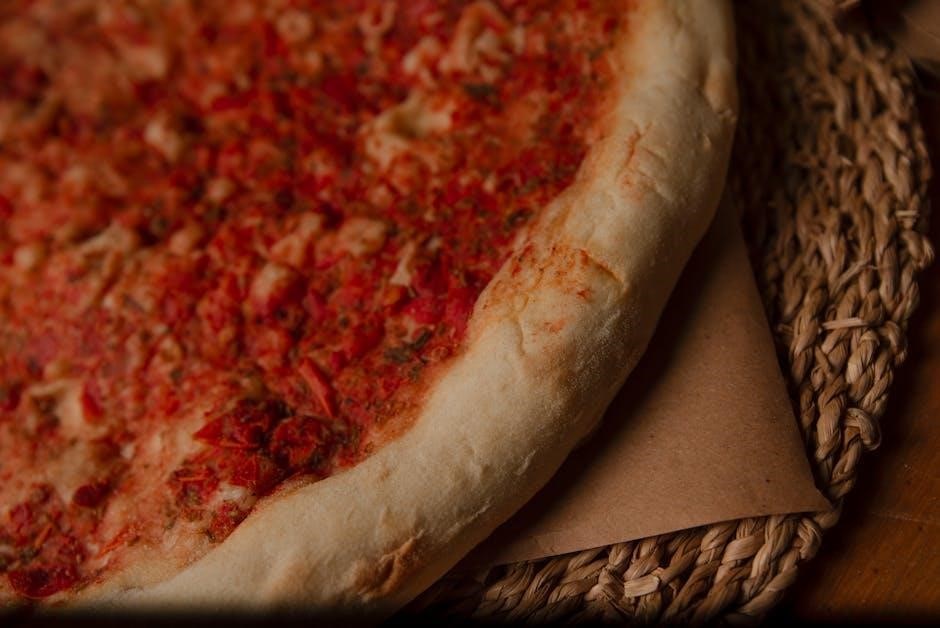
Milton’s Cauliflower Pizza represents a delightful fusion of health-conscious eating and satisfying flavor. It’s designed for those seeking a gluten-free alternative without compromising on the joy of pizza. The foundation of this pizza lies in its carefully crafted cauliflower crust, offering a lighter and vegetable-rich base compared to traditional doughs.
This isn’t just about substituting ingredients; it’s about elevating the pizza experience. Milton’s focuses on honestly delicious food, elevating flavors and providing a genuinely enjoyable meal. The pizza is often topped with roasted vegetables, enhancing both the nutritional value and the taste profile.
Understanding that many were initially hesitant about cauliflower crust, Milton’s has dedicated itself to perfecting the recipe. The goal is to deliver a crispy crust that rivals traditional pizza bases, ensuring a bubbly cheese topping and a golden finish. Whether you’re a long-time cauliflower pizza enthusiast or a newcomer, Milton’s aims to convert you with its quality and taste. It’s a pizza that caters to diverse dietary needs and preferences, making it a versatile choice for any occasion.
What is a Cauliflower Pizza Crust?
A cauliflower pizza crust is a clever and increasingly popular alternative to traditional wheat-based pizza dough. It’s created by processing cauliflower into a rice-like consistency, then combining it with ingredients like cheese, eggs, and seasonings to bind it together. This mixture is then pressed into a pizza shape and baked until firm enough to support toppings.
The result is a gluten-free, lower-carbohydrate crust that offers a surprisingly satisfying texture. While initially met with skepticism, advancements in recipes have led to cauliflower crusts that achieve a genuinely crispy base when cooked correctly. It’s a fantastic option for individuals with gluten sensitivities, those following low-carb diets, or anyone simply looking to incorporate more vegetables into their meals.
Milton’s utilizes this innovative crust to deliver a healthier pizza experience. It’s not merely a substitute, but a foundation for a flavorful and nutritious meal. Achieving the perfect texture requires attention to baking time and temperature, ensuring a golden and firm crust capable of holding all your favorite toppings.
Benefits of Choosing Milton’s Cauliflower Pizza
Milton’s Cauliflower Pizza offers a delightful fusion of taste and well-being, presenting numerous advantages over conventional pizza options. Primarily, it caters to dietary needs, being naturally gluten-free, making it accessible to those with sensitivities or celiac disease. Beyond that, it’s a fantastic choice for individuals embracing lower-carbohydrate lifestyles, aiding in weight management and promoting balanced nutrition.
But the benefits extend beyond dietary restrictions. Milton’s prioritizes honestly delicious food, elevating flavors with thoughtfully selected ingredients. The all-vegetable base, featuring a crispy cauliflower crust, subtly enhances the overall taste profile, allowing toppings to truly shine. It’s a guilt-free indulgence, allowing you to enjoy a classic comfort food without compromising your health goals.
Choosing Milton’s means opting for a pizza that’s both convenient and conscientious. It’s a simple way to increase your vegetable intake, contributing to a healthier diet. Enjoy a satisfying meal knowing you’ve made a choice that supports both your palate and your well-being.
Preparing to Bake Milton’s Pizza
Before baking, ensure all ingredients are ready. Confirm you have the pizza and are prepared to follow the cooking instructions for optimal results.
Checking the Ingredients
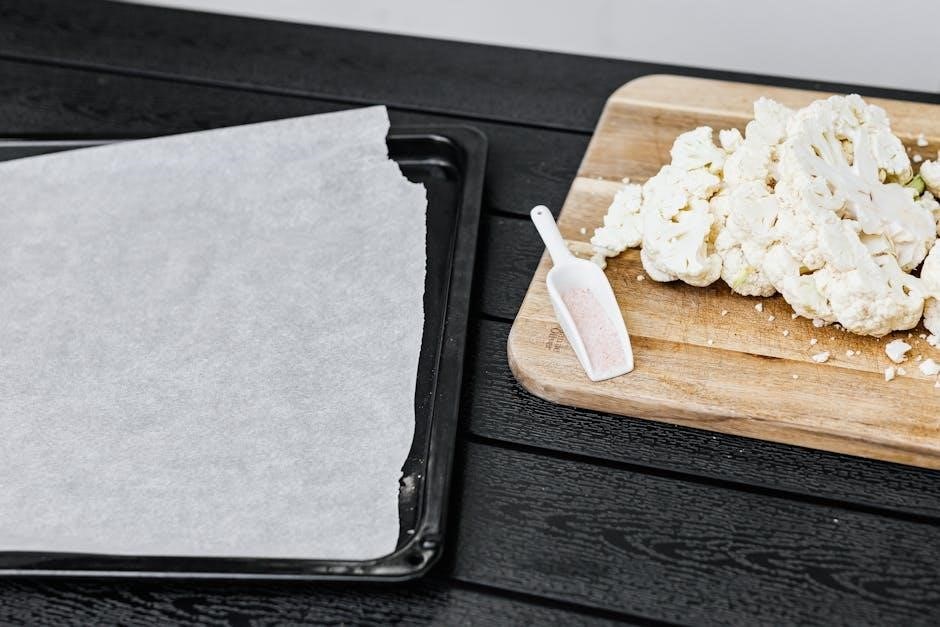
Prior to initiating the baking process, a thorough ingredient check is paramount for a successful Milton’s Cauliflower Pizza experience. Begin by verifying the presence of the pizza itself, ensuring the packaging is intact and shows no signs of damage. Confirm the pizza has been stored correctly, ideally in the freezer until ready for baking.
Next, inspect the pizza’s components visually. Ensure the roasted vegetables appear fresh and evenly distributed across the cauliflower crust. The cheese should be firmly adhered and exhibit a consistent color. A quick assessment of the crust itself is also crucial; it should be solid and free from any cracks or excessive crumbling.
If you plan to add any supplemental toppings – perhaps a sprinkle of red pepper flakes or a drizzle of olive oil – have those readily available. Finally, double-check that you have all necessary baking equipment, such as a baking sheet or air fryer basket, before proceeding. A prepared and verified ingredient list sets the stage for a delightful and hassle-free baking experience.
Preheating Your Oven
Achieving the ideal baking temperature is critical when preparing Milton’s Cauliflower Pizza. Preheating your oven ensures even cooking and a delightfully crispy crust. Begin by setting your oven to the recommended temperature – details are provided in the subsequent section. Allow sufficient time for the oven to reach the set temperature; a minimum of 15-20 minutes is generally advised.
Using an oven thermometer is highly recommended to verify the internal temperature, as oven calibrations can vary. A consistent temperature throughout the baking process is essential for optimal results. While the oven is preheating, position the oven rack in the center position. This promotes uniform heat distribution around the pizza.
Avoid opening the oven door frequently during preheating, as this can cause temperature fluctuations. A fully preheated oven is the foundation for a perfectly baked Milton’s Cauliflower Pizza, guaranteeing a golden crust and bubbly, melted cheese. Patience during this initial step is key to a satisfying outcome.
Recommended Oven Temperature
For consistently excellent results with Milton’s Cauliflower Pizza, maintaining the correct oven temperature is paramount. We recommend a baking temperature of 400°F (204°C). This temperature strikes a balance, ensuring the cauliflower crust becomes beautifully crisp while the toppings cook through and the cheese melts to golden perfection.
However, slight adjustments may be necessary depending on your oven’s specific characteristics. If you notice the crust is browning too quickly, reduce the temperature by 25°F (14°C) for the next pizza. Conversely, if the pizza isn’t browning sufficiently, increase the temperature slightly.
Consistent temperature monitoring with an oven thermometer is highly encouraged. Remember that convection ovens may cook slightly faster, potentially requiring a reduction in baking time. Always refer to the package instructions for the most up-to-date recommendations. Achieving the ideal temperature is the cornerstone of a delicious Milton’s Cauliflower Pizza experience.
Baking Instructions: Oven Method
To bake Milton’s Cauliflower Pizza in the oven, preheat to 400°F (204°C). Place the pizza directly on the rack or a baking sheet for optimal crispness.
Optimal Baking Time (Single Pizza)
When baking a single Milton’s Cauliflower Pizza, achieving the perfect balance of a crispy crust and melted cheese requires careful attention to baking time. Generally, a baking duration of 13 to 15 minutes is recommended. However, this timeframe can slightly vary depending on your oven’s specific heating characteristics and the initial temperature of the pizza itself.
Begin by preheating your oven to the recommended temperature – typically around 400°F (204°C). Once preheated, place the pizza directly on the oven rack or on a baking sheet. Monitoring the pizza closely during the final few minutes is crucial. Look for a golden-brown crust and bubbly, melted cheese as indicators of doneness.
If you prefer a slightly more well-done crust, you can extend the baking time by an additional minute or two, but be cautious to avoid burning. Remember that ovens can differ, so checking for visual cues is more reliable than strictly adhering to a set time. A perfectly baked Milton’s Cauliflower Pizza will have a delightful crunch and a satisfyingly melted cheese topping.
Optimal Baking Time (Multiple Pizzas)
Baking multiple Milton’s Cauliflower Pizzas simultaneously requires a slight adjustment to the baking time compared to baking a single pizza. When cooking two pizzas concurrently, it’s generally recommended to increase the baking time to 17 minutes and 30 seconds. This extended time ensures that both pizzas cook evenly and achieve the desired level of crispness.
Ensure sufficient space between the pizzas on the oven rack or baking sheets to allow for proper air circulation. Overcrowding can lead to uneven cooking and a potentially soggy crust. Maintaining a consistent oven temperature of around 400°F (204°C) is vital throughout the baking process.
Regularly monitor the pizzas, checking for a golden-brown crust and bubbly, melted cheese. While the suggested time is a good starting point, individual ovens may vary. Adjust the baking time accordingly to achieve optimal results. A slightly longer baking time guarantees that both pizzas are thoroughly cooked and delightfully crispy.
Monitoring the Pizza During Baking
Consistent observation is key to perfectly baked Milton’s Cauliflower Pizza. Begin checking the pizza around the 10-minute mark, even if the suggested baking time hasn’t elapsed. Visual cues are your best indicators of doneness. Focus on the crust – it should be transitioning to a golden-brown color, indicating crisping is occurring.
Simultaneously, assess the cheese. It should be fully melted and beginning to bubble, with slight browning in spots. Avoid opening the oven door excessively, as this can lower the temperature and affect cooking time. Quick peeks are sufficient.
If the crust is browning too quickly but the cheese isn’t fully melted, consider lowering the oven temperature slightly or covering the edges of the crust with foil. Conversely, if the cheese is bubbling but the crust remains pale, increase the baking time in short increments. Careful monitoring ensures a delightful, evenly cooked pizza.
Achieving a Golden Crust
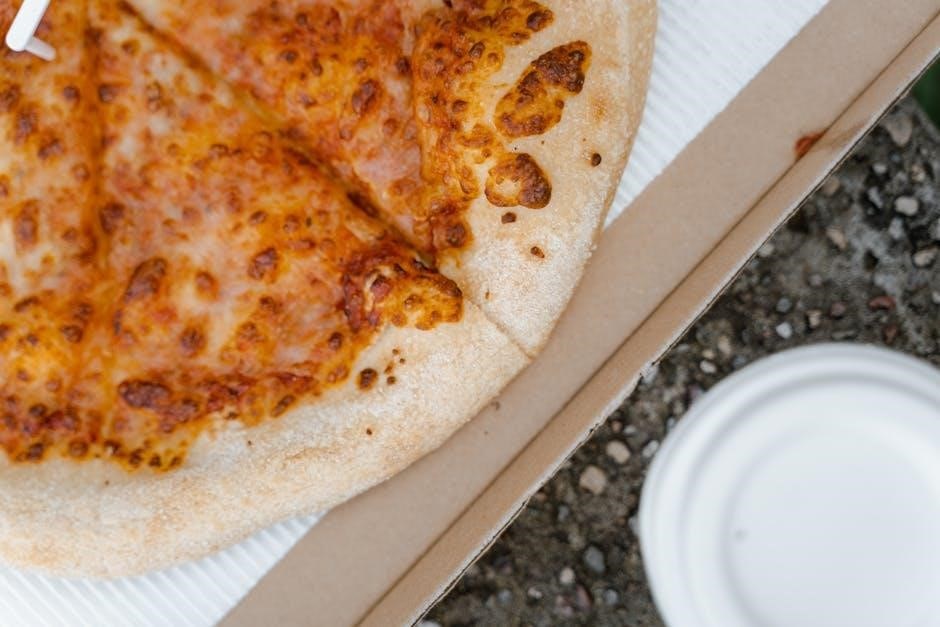
A golden crust is the hallmark of a perfectly baked Milton’s Cauliflower Pizza, signifying both crispness and flavor development. Achieving this requires a balance of oven temperature and baking time. Ensure your oven is fully preheated to the recommended temperature before placing the pizza inside.
During baking, monitor the crust’s color closely. It should gradually transform from pale to a rich, golden-brown hue. This process typically takes between 13 to 17 minutes, depending on your oven and whether you’re baking one or multiple pizzas.
If the crust isn’t browning sufficiently, a slight increase in baking time – in 2-minute increments – can help. For even browning, rotate the pizza halfway through the baking process. Remember, a golden crust isn’t just about aesthetics; it’s a testament to a crispy, satisfying bite!
Checking Cheese Melt and Bubble
Alongside a golden crust, properly melted and bubbly cheese is crucial for a delightful Milton’s Cauliflower Pizza experience. As the pizza bakes, observe the cheese closely. It should transition from a solid, opaque state to a melted, slightly browned, and bubbly texture.
Bubbling indicates that the cheese is fully heated and beginning to caramelize, enhancing its flavor. The cheese should be evenly distributed and exhibit pockets of melted goodness. If the cheese isn’t bubbling after the recommended baking time, extend the baking duration in short intervals – approximately 1 to 2 minutes – until the desired effect is achieved.
However, be cautious not to overbake, as this can lead to burnt cheese. A perfectly bubbly cheese layer complements the crispy crust, creating a harmonious and satisfying pizza experience. Ensure proper food safety by allowing a brief cooling period before serving.
Alternative Baking Methods
Beyond the conventional oven, Milton’s Cauliflower Pizza excels with air frying! This method delivers a remarkably crisp crust in a fraction of the time, offering a convenient alternative for quick, delicious meals.
Air Fryer Cooking Instructions
For those seeking a quicker route to pizza perfection, the air fryer is an excellent choice for baking Milton’s Cauliflower Pizza. This method consistently yields a delightfully crispy crust, rivaling oven-baked results but in significantly less time. Begin by ensuring your air fryer basket is clean and, if desired, lightly greased with cooking spray to prevent sticking.
Carefully place the frozen Milton’s Cauliflower Pizza directly into the air fryer basket, ensuring it fits without overcrowding. Avoid stacking pizzas, as this can hinder even cooking. The air fryer’s circulating heat works wonders on the cauliflower crust, creating a texture that’s both satisfyingly crunchy and tender.
Cooking times will vary slightly depending on your specific air fryer model, but generally, a shorter cooking duration is required compared to oven baking. Keep a close watch during the final minutes to prevent burning, and adjust the temperature if needed. The air fryer offers a fantastic way to enjoy Milton’s pizza with a superior crust texture and reduced cooking time!
Air Fryer Temperature and Time
To achieve the best results when air frying Milton’s Cauliflower Pizza, a temperature of 350°F (175°C) is generally recommended. This temperature strikes a balance between ensuring the crust cooks through completely and preventing the cheese from burning prematurely. For a single pizza, a cooking time of approximately 12-15 minutes is typically sufficient.
However, if you’re cooking two pizzas simultaneously, it’s advisable to extend the cooking time to around 17-18 minutes. This extra time allows the air fryer to maintain consistent heat circulation and cook both pizzas evenly. Regularly check the pizza’s progress, especially during the last few minutes, to monitor the cheese melt and crust color.
Remember that air fryer models can vary, so these times are guidelines. Adjust as needed based on your appliance. A golden-brown crust and bubbly, melted cheese are the key indicators of a perfectly cooked Milton’s Cauliflower Pizza in the air fryer!
Adjusting for Air Fryer Models
Air fryers differ significantly in power and airflow, necessitating adjustments to cooking times for Milton’s Cauliflower Pizza. Models with higher wattage generally cook faster, potentially requiring a reduction in the recommended 12-18 minute timeframe. Conversely, smaller or less powerful air fryers may need an extra 2-3 minutes to achieve the same level of crispness.
Observe the pizza closely during the initial cook. If the cheese is browning too quickly, lower the temperature slightly or shield it with a small piece of foil. For models with limited space, ensure the pizza isn’t overcrowded, as this hinders proper air circulation. Rotating the pizza halfway through cooking can also promote even browning.
Experimentation is key! Keep detailed notes on your air fryer’s performance with Milton’s pizza to refine your technique. A slightly longer cook time is preferable to a soggy crust, but always prioritize preventing burnt cheese.
Post-Baking Steps
Allow the baked Milton’s Cauliflower Pizza to cool for 2-3 minutes before slicing and serving. This ensures cheese sets and prevents burns. Enjoy responsibly, following all food safety guidelines!
Cooling Time Before Serving
Allowing your freshly baked Milton’s Cauliflower Pizza a brief cooling period is a crucial step often overlooked, yet significantly impacts the overall enjoyment of your meal; Immediately slicing into a hot pizza can result in a messy experience, with molten cheese sliding off and toppings shifting haphazardly. A cooling time of 2-3 minutes, as recommended, allows the cheese to firm up slightly, creating cleaner, more defined slices.

This short rest also benefits the structural integrity of the cauliflower crust itself; While designed to be crispy, the crust is still somewhat delicate when freshly removed from the oven. Cooling allows it to stabilize, preventing it from becoming soggy or breaking apart during cutting and serving. Furthermore, the flavors continue to meld and develop during this brief cooling phase, enhancing the overall taste experience.
Resist the temptation to dive in immediately! A little patience will reward you with a beautifully presented and more enjoyable slice of Milton’s Cauliflower Pizza. It’s a small step that makes a big difference in ensuring a satisfying and mess-free dining experience for everyone.
Ensuring Food Safety
Prioritizing food safety when preparing Milton’s Cauliflower Pizza is paramount; Following the recommended cooking instructions is the first and most important step in eliminating potential health risks. The pizza must reach an internal temperature sufficient to kill any harmful bacteria that may be present in the ingredients, particularly those of animal origin like cheese or any meat toppings.
While Milton’s pizza is often pre-cooked, completing the baking process ensures thorough heating. Always verify that the cheese is fully melted and bubbly, and the crust is golden brown – visual cues indicating adequate cooking. Avoid consuming any portion of the pizza that appears undercooked or has a noticeably different texture. Proper handling of the pizza, from removing it from the packaging to serving, is also essential.
Use clean utensils and surfaces, and avoid cross-contamination with raw foods. Remember to adhere to the 2-hour rule: do not leave the cooked pizza at room temperature for more than two hours, or one hour if the ambient temperature exceeds 90°F (32°C). Following these guidelines guarantees a safe and delicious meal.
Serving Suggestions
Elevate your Milton’s Cauliflower Pizza experience with these delightful serving suggestions! After allowing a brief 2-3 minute cooling period – crucial for preventing burns and allowing the cheese to set slightly – consider pairing your pizza with a fresh, vibrant side salad. A simple green salad with a light vinaigrette complements the pizza’s flavors beautifully.
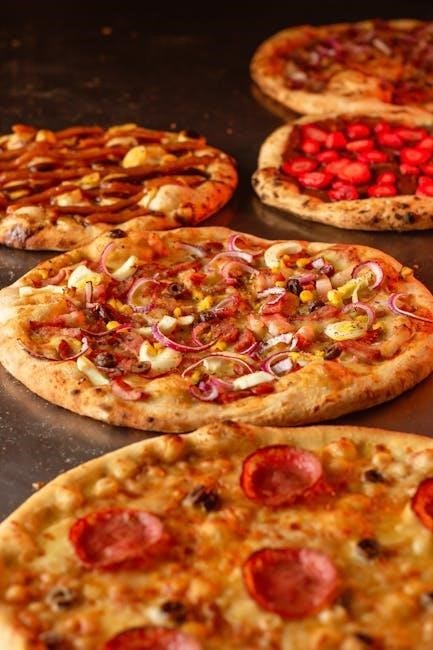
For a more substantial meal, accompany the pizza with roasted vegetables, mirroring the delicious vegetable toppings often found on Milton’s varieties. A crisp, chilled glass of white wine or a sparkling water with a lemon wedge can further enhance the dining experience. To add a touch of zest, sprinkle a pinch of red pepper flakes or a drizzle of balsamic glaze over the slices.
Don’t hesitate to experiment with dipping sauces! Ranch, garlic aioli, or even a spicy marinara sauce can add an extra layer of flavor. Ultimately, Milton’s Cauliflower Pizza is versatile enough to be enjoyed on its own or as part of a more elaborate spread, making it perfect for any occasion.

Troubleshooting Common Issues
Encountering problems? This section addresses common baking challenges with Milton’s Cauliflower Pizza, offering solutions for soggy crusts, uneven cooking, and preventing burnt cheese.
Soggy Crust Solutions
A soggy crust is a frequent concern when baking cauliflower pizza, but easily remedied! Ensuring proper preheating is paramount; a sufficiently hot oven is crucial for crisping the base. Before baking, consider pre-baking the crust without toppings for 5-7 minutes. This initial bake helps solidify the cauliflower base, reducing moisture absorption from the sauce and toppings.
Furthermore, avoid overloading the pizza with sauce. A thin, even layer is best. Excess moisture from the sauce directly contributes to sogginess. Patting the cauliflower crust with a paper towel to remove any surface moisture before adding toppings can also be beneficial. If using fresh vegetables, lightly sauté them beforehand to release some of their water content.
Finally, ensure the oven isn’t opened frequently during baking, as this lowers the temperature and can hinder crisping. If you’re still experiencing issues, try placing the pizza directly on the oven rack for the last few minutes of baking to promote airflow underneath the crust. A little extra attention to these details will yield a delightfully crisp and satisfying pizza!
Unevenly Cooked Pizza
Experiencing an unevenly cooked Milton’s Cauliflower Pizza is frustrating, but often easily corrected. The primary culprit is usually inconsistent oven heat distribution. Rotating the pizza halfway through the baking process is vital; this ensures all sections receive equal exposure to the oven’s heat.
If your oven has hot spots, identifying them and adjusting the pizza’s position accordingly can significantly improve results. Using a pizza stone or baking steel can also promote more even heat distribution, as they retain and radiate heat effectively. Ensure the pizza is placed on a middle rack for optimal airflow and consistent cooking.
Furthermore, verify that toppings are evenly distributed. Large clumps of vegetables or cheese can create localized areas of higher moisture, leading to uneven cooking. If using an air fryer, ensure the pizza isn’t overcrowded, allowing for proper air circulation. A little attention to these details will ensure a uniformly cooked and delicious pizza every time!
Burnt Cheese Prevention
Preventing burnt cheese on your Milton’s Cauliflower Pizza is key to a perfect bake. The most common cause is exceeding the recommended baking time or setting the oven temperature too high. Closely monitoring the pizza during the final few minutes of baking is crucial; cheese can go from golden to burnt quickly.
If you notice the cheese is browning too rapidly, reduce the oven temperature slightly or briefly remove the pizza from the oven. Consider shielding the edges of the pizza with small pieces of aluminum foil if they are browning faster than the center. For air fryer cooking, reducing the temperature and checking frequently is even more important due to the concentrated heat.
Remember, different ovens and air fryer models vary, so adjusting baking times and temperatures may be necessary. A slightly underbaked pizza is preferable to a burnt one, as you can always add a minute or two of baking time. Enjoy a perfectly melted, golden-brown cheese topping every time with these simple precautions!